Say Goodbye to the Machine: How to Make Ultra-Creamy Homemade Ice Cream Effortlessly
Picture this: a sweltering afternoon, a sudden craving for something divinely cold and creamy, but the thought of wrestling with an ice cream maker or making another trip to the store feels like too much effort. What if we told you that creating luxurious, incredibly smooth homemade ice cream is not only possible but surprisingly simple, requiring absolutely no special equipment? Forget the rock salt, the complicated churners, and the lengthy custard-making process. Get ready to discover the ultimate homemade ice cream recipe that will change your dessert game forever.
For years, making ice cream at home felt like a culinary Everest �� a beautiful dream, but one reserved for seasoned chefs or those with ample counter space for bulky gadgets. I, like many, assumed that achieving that perfect, rich texture without an industrial-grade machine was a myth. However, after countless experiments and a deep dive into the art of no-churn desserts, I cracked the code. This isn't just a recipe; it's a revelation, a secret weapon for spontaneous cravings, last-minute celebrations, and those cherished moments when you want to create a little magic in your kitchen.
The beauty of this method lies in its elegant simplicity. It’s a testament to the idea that sometimes, the most profound pleasures come from the fewest, finest ingredients. You likely already have everything you need in your pantry and fridge, poised to transform into a frozen masterpiece. Prepare to be amazed by how easily you can whip up ultra-creamy, absolutely delicious ice cream that rivals any store-bought pint, but with the pure satisfaction of knowing exactly what went into every spoonful.
Why This No-Churn Homemade Ice Cream Recipe Is a Game-Changer
This isn't just another ice cream recipe; it's a fundamental shift in how you'll approach homemade desserts. Here's why this particular homemade ice cream recipe will quickly become your go-to:
- Unbelievable Simplicity: We're talking about a handful of ingredients – typically five – that you probably already stock. No need for exotic additions or a lengthy shopping list.
- No Special Equipment: This is the headline feature! Forget about expensive, bulky ice cream makers. All you need is a large bowl, a whisk (or an electric mixer), and a freezer-safe container. It's truly a "no machine" marvel. For more details on this aspect, check out our article: Easy Homemade Ice Cream: No Machine, Just 5 Simple Ingredients.
- Decadent Creaminess: This is where the magic happens. Despite its simplicity, the resulting texture is incredibly rich, smooth, and utterly free from the icy crystals that often plague homemade versions. Your family will swear you've been taking pastry classes.
- Unrivaled Versatility: While vanilla is a divine starting point, this base is a blank canvas for endless flavor creativity. From classic chocolate to adventurous fruit swirls, your imagination is the only limit.
- Pure Ingredients: You have complete control over what goes into your dessert. Say goodbye to unpronounceable additives and hello to wholesome, delicious goodness.
The genius behind this approach isn't new; it's a clever combination of foundational techniques and readily available ingredients that, when brought together, create something truly extraordinary. It's about letting the natural properties of rich dairy and sweet indulgence work their magic with a little help from your freezer.
The Simple Science Behind Ultra-Creamy Texture (Without the Fuss)
Understanding why this homemade ice cream recipe works so well makes the process even more satisfying. It’s not magic; it's smart ingredient selection:
- Heavy Cream: The Foundation of Richness. Heavy cream, with its high-fat content (typically 36% or more), is the star here. When whipped, it incorporates air, creating a light, airy structure. More importantly, the fat globules in heavy cream interfere with the formation of large ice crystals. Large ice crystals are the enemy of creamy ice cream, leading to a gritty or icy texture. The fat helps keep these crystals small and imperceptible, resulting in that smooth, luxurious mouthfeel.
- Sweetened Condensed Milk: The Unsung Hero. This ingredient pulls triple duty. Firstly, it provides sweetness, eliminating the need to dissolve sugar or cook a custard. Secondly, its high sugar content and milk solids contribute to a lower freezing point, which also helps prevent large ice crystal formation and keeps the ice cream softer and scoopable even when frozen solid. Thirdly, the milk solids add body and richness, giving the ice cream a satisfying density. For a deeper dive into this ingredient, check out The Secret to Rich, Creamy Homemade Ice Cream (Just 5 Ingredients).
- Vanilla Extract (or other flavorings): The Essence. Beyond flavor, vanilla extract (and other alcohol-based extracts) also contribute slightly to lowering the freezing point, albeit minimally. Its primary role is, of course, to infuse that classic, comforting taste.
- Air: The Invisible Ingredient. Whipping the heavy cream introduces air, creating tiny pockets that further disrupt ice crystal formation and give the ice cream its characteristic light, fluffy, yet still dense texture. This aeration is crucial for a smooth, scoopable result without churning.
By combining these elements, you create a base that naturally resists large ice crystals, stays soft, and delivers incredible flavor without any mechanical churning.
Gathering Your Essentials: Ingredients & Equipment for Your Homemade Ice Cream Recipe
The beauty of this method lies in its minimalist approach. You truly don't need much!
Ingredients:
This is for the classic, irresistible vanilla base. Feel free to adjust based on your preferences or dietary needs (e.g., dairy-free condensed milk for a vegan alternative).
- 2 cups (475ml) Cold Heavy Cream (or heavy whipping cream): Crucial for the creamy texture and structure. Ensure it’s very cold for optimal whipping.
- 1 can (14oz / 397g) Sweetened Condensed Milk: Provides sweetness, body, and helps prevent ice crystals. Do NOT confuse this with evaporated milk.
- 1-2 teaspoons Pure Vanilla Extract: For that quintessential ice cream flavor. Use good quality extract for the best taste.
- A tiny pinch of Salt: A secret weapon! It enhances all the other flavors, balancing the sweetness and making the ice cream taste even richer.
Equipment:
No special trips to the kitchen supply store required!
- Large Mixing Bowl: Preferably chilled in the freezer for 10-15 minutes beforehand, especially if your kitchen is warm. This helps the cream whip up faster and firmer.
- Electric Mixer (Stand or Handheld) OR a good sturdy Whisk: An electric mixer makes whipping cream much quicker and easier, but a strong arm and a whisk will certainly do the job.
- Rubber Spatula: For gently folding and scraping.
- Freezer-Safe Container: A loaf pan (9x5 inches) is ideal, but any airtight container (plastic or glass) with a lid that holds about 1.5 to 2 quarts will work perfectly.
Your Step-by-Step Guide to an Irresistible Homemade Ice Cream Recipe
Let's get down to the simple steps that will transform these humble ingredients into a frozen delight.
- Chill Your Bowl (Optional, but Recommended): Place your large mixing bowl and whisk attachment (if using an electric mixer) in the freezer for 10-15 minutes. This helps the cream whip up faster and achieve stiffer peaks.
- Whip the Heavy Cream: Pour the cold heavy cream into the chilled bowl. Using an electric mixer (or whisk), beat the cream on medium-high speed until it forms stiff peaks. This means when you lift the whisk, the cream holds its shape firmly. Be careful not to over-whip, or it will turn grainy.
- Prepare the Sweetened Condensed Milk Mixture: In a separate bowl (or directly into the sweetened condensed milk can if it’s clean and wide enough), stir together the sweetened condensed milk, vanilla extract, and the pinch of salt until well combined.
- Gently Fold the Mixtures: Pour the sweetened condensed milk mixture over the whipped cream. Using your rubber spatula, gently fold the two together. Be careful not to deflate the whipped cream too much – the air you've incorporated is crucial for the creamy texture. Fold until just combined, with no streaks of plain cream or condensed milk visible.
- Transfer and Freeze: Pour the mixture into your freezer-safe container, spreading it evenly. You can gently tap the container on the counter a few times to release any large air bubbles. Cover the container tightly with a lid or plastic wrap.
- Patience is Key: Place the container in the freezer for at least 6-8 hours, or preferably overnight, until it's completely firm. Resist the urge to peek too often!
Once frozen, your ultra-creamy, absolutely delicious homemade ice cream is ready to be scooped and enjoyed!
Unleashing Your Inner Flavor Creator: Beyond Vanilla
While classic vanilla is a masterpiece on its own, this homemade ice cream recipe is incredibly adaptable. Here are just a few ideas to spark your creativity:
- Chocolate Lover's Dream: Swirl in 1/2 cup of melted and slightly cooled chocolate (dark, milk, or white) during the folding step. Or add 1/2 cup of unsweetened cocoa powder to the sweetened condensed milk mixture before folding.
- Coffee Buzz: Dissolve 1-2 tablespoons of instant espresso powder or strong instant coffee in a tablespoon of hot water, let it cool, then stir it into the sweetened condensed milk mixture.
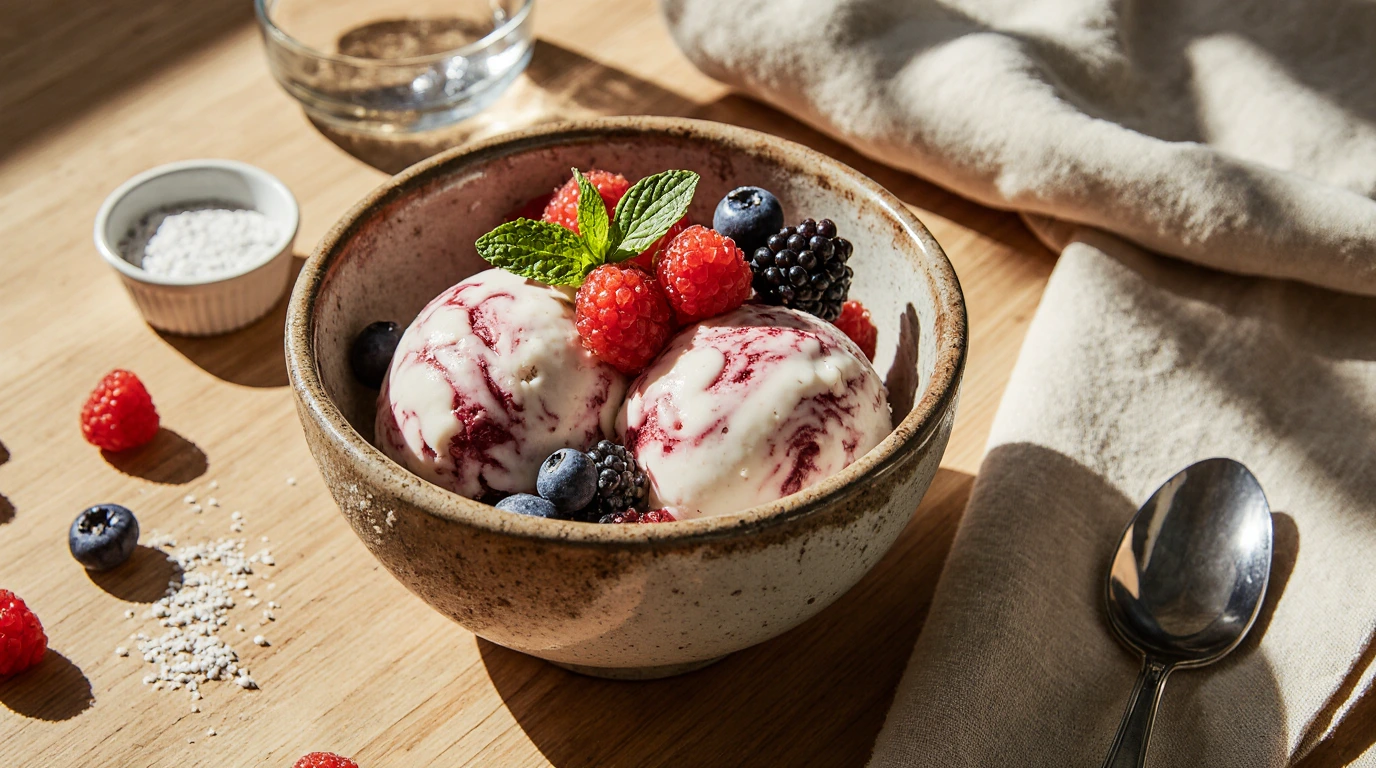
- Fruit Sensation: Swirl in 1/2 to 1 cup of fruit purée (strawberries, raspberries, mangoes, peaches) after folding the base. For best results, cook and cool the fruit slightly to reduce water content.
- Mint Chocolate Chip: Add 1-2 teaspoons of pure peppermint extract and 1/2 cup of mini chocolate chips or chopped chocolate bars.
- Cookie Dough Delight: Fold in 1/2 to 1 cup of edible cookie dough chunks (store-bought or homemade using heat-treated flour) after the base is folded.
- Nutty Indulgence: Swirl in 1/2 cup of your favorite nut butter (peanut, almond, cashew) and sprinkle with chopped nuts.
- Caramel Swirl: After transferring the base to the freezer container, drizzle in warmed caramel sauce and use a knife or skewer to gently swirl it through.
The possibilities are truly endless! Don't be afraid to experiment with your favorite candies, cookies, nuts, or extracts.
Tips for the Perfect Scoop & Storage
- Softening for Scooping: For the best texture, remove your ice cream from the freezer about 5-10 minutes before you plan to serve it. This allows it to soften slightly, making it easier to scoop and enhancing its creamy consistency.
- Prevent Freezer Burn: To keep your homemade ice cream fresh and free from ice crystals for longer, press a piece of plastic wrap or parchment paper directly onto the surface of the ice cream before putting the lid on the container. This creates an extra barrier against air and moisture.
- Storage Duration: This no-churn ice cream will maintain its best texture and flavor for up to 1-2 weeks in an airtight container in the freezer. After that, while still safe to eat, it may start to develop a slightly icier texture.
The Sweetest Reward: Your Homemade Ice Cream Awaits!
There you have it – the definitive guide to creating ultra-creamy homemade ice cream without the need for a machine. This homemade ice cream recipe isn't just about making dessert; it's about reclaiming the joy of simple pleasures, empowering yourself in the kitchen, and creating unforgettable moments with family and friends. From its ridiculously easy preparation to its rich, velvety texture, this recipe proves that you don't need fancy gadgets or culinary degrees to whip up something truly extraordinary.
So, the next time that craving strikes, skip the store and embrace the magic of no-churn. With just a few ingredients, a little bit of mixing, and a dash of patience, you'll be scooping out your very own slice of frozen heaven. Enjoy the unparalleled satisfaction of knowing you made it yourself!
